Components and Parts Idea/Ad Exchange, free for members. > North
> Automation
> Be a gunsmith machinist lathe mill machining techniques
Be a gunsmith machinist lathe mill machining techniques
bounce, yer money order will get lost in the mail and yer dog won't come home.
click on our "Contact Us" icon above for the quickest response to your questions.
BE A GUNSMITH MACHINIST LATHE MILL MACHINING TECHNIQUES
BE A GUNSMITH MACHINIST LATHE MILL MACHINING TECHNIQUES
BE A GUNSMITH MACHINIST LATHE MILL MACHINING TECHNIQUES
BE A GUNSMITH MACHINIST LATHE MILL MACHINING TECHNIQUES
BE A GUNSMITH MACHINIST LATHE MILL MACHINING TECHNIQUES
BE A GUNSMITH MACHINIST LATHE MILL MACHINING TECHNIQUES
BE A GUNSMITH MACHINIST LATHE MILL MACHINING TECHNIQUES
BE A GUNSMITH MACHINIST LATHE MILL MACHINING TECHNIQUES
BE A GUNSMITH MACHINIST LATHE MILL MACHINING TECHNIQUES
BE A GUNSMITH MACHINIST LATHE MILL MACHINING TECHNIQUES
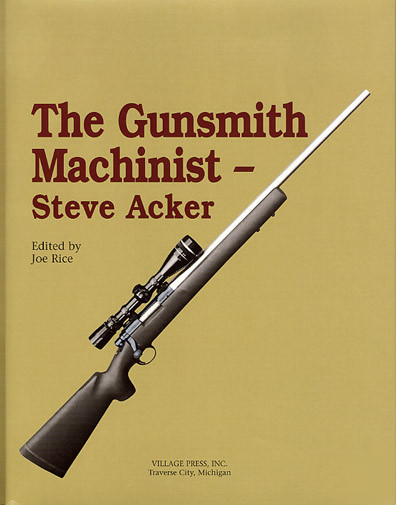
If you've been making guns or parts for guns the name Steve Acker is familiar to you. If not it should be. Steve is one of those rare guys who not only knows what he's doing in the shop, he can get the procedures down on paper so you and I can do it exactly like he does with the same results.
It's easy to spend three days on a job that should have taken twenty minutes. The difference is in knowing how to do the set up. Here Steve gives you that know-how together with a generous dose of his many years experience as a gunsmith machinist. 34 gunsmithing projects and 20 more machining projects and a meat smoker project fill out these 205 pages.
Here's Steve to introduce each project.
Modern manufacturing techniques usually allow for some kind of tolerance in the area of the receiver that accepts the telescopic sight bases. Manufacturers of scope mounts designed to fit a specific rifle also have tolerances in their manufacturing. The quality of the fit between the two is usually excellent. Once in a while, however, when a rifle receiver and the corresponding base come together, the accumulation of tolerances prevents a professional job from being as easy as bolting the two together. The machine work required to fix this type of mismatch usually involves a minimal amount of metal removal. Precision shooters, such as benchrest shooters, fit bases to their rifles as a matter of course.
More severe problems occur when a receiver is warped or otherwise far enough out of tolerance that the center lines of the rings cannot be brought in line with normal scope ring lapping. Mounting a scope in a set of rings resting on such mismatched bases puts bending pressure on the scope tube and is detrimental to accuracy. In some cases the scope may not have enough internal adjustment to allow proper zeroing.
This is usually corrected by shimming under one of the scope bases. While shimming can be an excellent process, it will not fix mismatched radiuses on the base and receiver.
A similar problem occurs when there is no off-the-shelf mount available for a firearm, and a mount must be made from a manufacturer's blank or universal base or fitted from a base meant for a different rifle. In these cases, only machining the bases will allow a proper installation.
The first and usually most utilized machine tool a gunsmith acquires is the metal lathe. It is used in rifle work for a myriad of functions including contouring, threading, and chambering rifle barrels. In chambering the barrel, the chambering reamer is supported at the tailstock by a center or a floating center.
The reamer is used in conjunction with headspace gages to obtain the narrow range of dimensions acceptable for the finished rifle chamber. The ability to advance the chambering reamer by extending the tailstock ram a precise amount is critical to the chambering process. This task can be made easy by building and using a tailstock ram travel measurement plate.
Many gunsmith jobs require machining a small precision part. After machining, many parts require hand-fitting. The creation of jigs to help machine parts is very helpful for common jobs. These same jigs can also be used to hold the work for the final hand-fitting.
The drawings and pictures show a jig used to machine the outside of 1911-type pistol "match grade" barrel bushings. This type of bushing is usually manufactured undersize where the barrel enters the bushing and oversize where the bushing fits into the pistol slide. Different brands of bushings require different amounts of machining and, of course, every slide has slightly different dimensions.
These bushings are used for repair, accuracy modifications, and reliability packages. The purpose of the pistol must be taken into consideration when fitting such bushings. A target shooter wants a very close fit, even if it occasionally causes malfunctions. A police officer wants reliability first and is less concerned about accuracy.
Most of the repair and modification work taken in by the gunsmith is done one job at a time. Each job must be done properly and quickly. The built-in accuracy and workholding ability of machine tools can be called upon to help. The gunsmith who has access to a milling machine, for instance, can make short work of precisely installing shotgun sight beads and many other similar jobs by using basic machinist techniques to locate, drill, and tap holes.
Many fine firearms occasionally require machine work. Machine work can't help damaging the bluing in areas that are actually cut, but damage to other areas of the bluing or actual scratching of the steel can be minimized.
One common lathe operation is recrowning a barrel, either because the crown is damaged or as part of the process of shortening a barrel. Gases from the bore 1st exit uniformly around the base of the bullet as it leaves the bore or the bullet will be moved around inconsistently. Thus, a correct crown enhances the precision of the rifle while a poor one can destroy any chances of accuracy.
Simply supporting the end of the barrel in a steady rest for this procedure has two problems: 1) The finish is damaged by the steady rest (not a concern if refinishing is part of the job); and 2) the outside of the barrel is rarely concentric with the bore, making proper crowning difficult.
A muzzle crown cut in the lathe at 90° to the barrel is relatively insensitive to a slightly off-center bore. This is not the case with the 11° target crown favored by many. A line drawn through the pointed top of the imaginary 11° cone that forms the crown to the center of the cone base must be absolutely concentric with the bore. If it is not, the meeting of bore and crown will be oval, not round, and will actually work against accuracy.
Much gunsmith work is done by a combination of machine work and hand work. Hand work in this context includes the use of hand-held power tools. The machine work makes metal removal fast and accurate. The hand work refines close tolerance fitting or finishes and blends in different cuts made on the machine tools.
The milling machine is a natural choice for the machine tool part of enlarging the ejection port on Colt 1911-type autopistols. The pistol slide is easily oriented in the vise for this work, the diameter of the milling cutter can be chosen such that the radius on the port corners is as desired, and the edges of the port are automatically aligned with the bottom of the slide. Porting is the common name for such work.
Porting increases reliability by making it easier for the fired cartridge case to eject from the pistol. This also helps keep the ejected brass from being damaged, making reloading easier. The ejected brass tends to fly more to the right and less up into the shooter's face. Porting is widely regarded as a necessity on duty or competition guns, and is now done at the factory on many newly manufactured pistols.
Rifle actions are "blueprinted" or "trued" as part of making very accurate target rifles. During part of this process, metal is removed when the rifle receiver threads are recut on the lathe to make them concentric to the receiver center line. This work increases the thread OD.
The new barrel is then threaded to match the newly machined, larger-than-standard receiver thread. The parts are assembled without the recoil lug, and the barreled action is then commonly glued directly into the rifle stock. The strength of the adhesive makes the recoil lug unnecessary and simplifies bedding. Removing the glued-in action, however, can be quite a chore when required. The action must be glued in again before a rifle modified in this manner can be used.
A hunting rifle can receive rough use in the field. The barreled action occasionally needs to be removed and cared for outside of the stock. An example would be cleaning and oiling the rifle metal after getting the rifle soaking wet. Because of this, accurized hunting rifles are not often glued into the stock. A recoil lug is required and used in the normal fashion.
When installed on a trued action, the recoil lug hole must be enlarged to accept the now larger threaded section of the barrel. Since the whole idea is improved accuracy, the work on the recoil lug must be done precisely. The bedding process still uses epoxy but is done in such a way that the metal parts are easily removable.
The front sight on a firearm is the guidepost that allows the shooter to direct his shot as he desires. The rear sight must also come into play, but the front sight is usually the one focused on during the shot. For this reason, the front sight is often replaced or modified on many firearms because it is too short, too tall, too wide, too narrow, or not shaped properly.
This becomes critical when trying to zero a fixed sight firearm. The rear sight is commonly drifted left or right for windage while the front sight is commonly used for proper elevation. Finding a properly constructed replacement sight, front or rear, can be difficult. This is a bigger problem for old or unusual firearms.
Much firearms work involves repair and upgrading someone's favorite old smokepole. A common request involves changing or upgrading sights since sights, including telescope sights, are a key factor in delivering the bullet accurately. The small size and unusual shapes of many iron sights make them difficult to hold for modification and repair.
Making simple fixtures that hold sights can make work faster and give better results than simply mounting the whole firearm in a vise. Properly designed fixtures transfer beautifully to the milling machine, allowing quick and precise work when machining is required and making it feasible to create a sight from scratch.
The gunsmith depends on the lathe for an enormous variety of work critical to his livelihood. The lathe is called on for an endless list of unusual jobs from making the always oddly dimensioned gun screw from scratch to close tolerance reaming of match rifle barrel chambers. The impressive versatility of the lathe is enhanced by simple attachments that allow the gunsmith to more easily use it for his unusual applications.
Threading up to a shoulder was made easier in the old days by general purpose engine lathes that had backgear spindle speeds as low as twelve RPM. A lathe helper can be built that enables a less sophisticated lathe to perform these tasks beautifully.
The Colt .45 semiautomatic pistol and its many copies have spawned a small manufacturing industry of improvement parts and upgrades designed to correct real and imagined deficiencies in the pistol design or production. Competitive shooters, for instance, often replace the small rear sight with a wider, taller, easier to see, adjustable rear sight like the Bomar. Such a rear sight change necessitates installing a matching taller front sight. This larger front sight is heavier than the original front sight, and mounting it on the pistol can cause problems.
The factory front sight has a small tang on the bottom that goes through the slide, and is peened like a rivet from the inside, joining the sight to the slide. This method is completely satisfactory for small sights, but when larger and heavier front sights are installed the same way, the riveted joint often fails. This is most common on guns that use full power ammunition. Target pistols use lighter recoiling target loads which do not induce as high a slide velocity during the firing cycle, lessening the recoil stress on the front sight. When the riveted-in front sight fails, it will sometimes only loosen, causing random shifting of zero. Often, the sight will simply fly off the pistol, almost always during use, seriously limiting the shooter's ability to deliver subsequent shots accurately.
A special 65° dovetail cutter .330" wide is used. The dovetail it cuts is intentionally undersized to allow for fitting. The Novak sight, several other brands of similar sights, and the required tooling are all available from Brownell's.
Making factory and custom rifles shoot more accurately is a pastime that many pursue. No less authority than the makers of Shilen rifle barrels have said that "bullets, barrels, and bedding" are the fountainheads of rifle accuracy. One technique of bedding rifles into the stock is called pillar bedding.
Full, stress free, and consistent support of the rifle receiver by the stock is an important part of an accurate rifle. Most receivers are connected to the stock by screws that run through the stock, normally from the trigger guard to the receiver. In a traditional wooden stock, wood between the trigger guard and the receiver can permanently compress under tension or move around due to its well known tendency to change size as it absorbs and releases moisture from and into the air. Oil and cleaning solvents also soften wood and allow compression and deterioration. These factors affect accuracy by altering the mounting screw tension and changing the stresses on the receiver and barrel.
Pillar bedding is an outgrowth of the fiberglass bedding process in which a rifle receiver coated with an appropriate release agent is set into a prepared rifle stock filled with a thin layer of epoxy. When the epoxy sets, the barreled receiver is removed, leaving a close to perfect fit of the rifle receiver to the stock. It was discovered that, even with this process, wood movement between the trigger guard and the receiver could still affect accuracy.
This problem was pretty much solved among the accuracy crowd by the introduction of the fiberglass stock.
As good or better results can be obtained more quickly by using stainless steel or aluminum pillars that surround each screw and extend from the receiver to the trigger guard. These pillars are normally installed in conjunction with an otherwise standard epoxy bedding job. The existing stock screw holes are enlarged to slightly more than the diameter of the pillars.
The epoxy gives the usual excellent fit of barreled receiver to rifle stock and also serves to secure the pillars in the stock. The stock screws do not touch the stock or the pillars at any point. The result is a rifle receiver that closely fits the stock and is fully supported by incompressible metal columns between it and the trigger guard. Such pillars are easily made in the shop as required to fit various action and stock configurations.
Every firearm has a manual of arms. Some manuals of arms come from the firearm manufacturer while some have been developed by organizations or individuals over time. The manual of arms is the accepted way of loading, unloading, aiming, firing, making safe, clearing stoppages, and otherwise operating, cleaning, and caring for the firearm. The manual of arms for most semi-automatic pistols tells the operator to check the barrel chamber for the presence of a live round before use and to remove the chambered round after use.
Most pistols have grasping grooves cut into the slide to make it easier to check the chamber. These grooves are usually on the back end of the slide so, when grasped by the shooter, the shooter's hand does not cover the muzzle or ejection port, possibly obstructing the ejection of the round. The latest updates to the manual of arms of some pistols suggests that grasping grooves toward the muzzle of the pistol make it easier to check the chamber visually while still keeping the hand away from the ejection port and muzzle.
One source said this started when pistol scope mounts made it difficult to access the existing grasping grooves. One story is that the additional grooves were in response to the "press check" technique of checking the chamber which some think is unsafe. Some feel that additional grasping grooves are purely cosmetic. Front grasping grooves have generally been accepted as allowing safer chamber inspection and, therefore, are beneficial to pistol shooters regardless of the sighting system used.
Those kings of firearms accuracy, the benchrest rifle shooting fraternity, tell us lesser mortals that the firing pin of a firearm must strike the center of the cartridge primer to get consistent primer ignition and the finest accuracy. This is true, but many suspect the difference in group size can be realized only in the kind of super accurate rifles that rule the benchrest game.
There is a more mundane but vital reason the firing pin strike should be centered in the primer. As firing pin strikes get farther and farther away from the center of the primer, ignition becomes less consistent. This leads first to poor accuracy, then, to the point that the cartridge may not always fire. Poor reliability may be only a nuisance to the target shooter but has more serious implications for the police officer or soldier.
The Colt type 1911 .45 ACP pistol design is such that it responds well to many accurizing procedures. One such procedure maximizes the engagement of the barrel locking lugs to the slide locking recesses. This increases accuracy by removing lost motion, but raises the center line of the barrel relative to the firing pin hole and often creates an off-centered firing pin strike.
The low pressure of the cartridge and the large diameter of its primer make the round relatively insensitive to firing pin misalignment of up to about .050" off center. Accurizing procedures, tolerance stacking, or incorrect machining of the component parts can all cause the firing pin to be misaligned more than this amount. Such a problem must be corrected for line of the barrel relative to the maximum reliability and accuracy.
Chambering and fitting a new rifle barrel is only one of many important steps in making a rifle shoot accurately. Chambering is a reaming process, and indeed the tools used are called chambering reamers. These reamers are not only different due to the obvious dissimilarity in the myriad kinds of rifle cartridges but vary for the same caliber in their critical dimensions depending on whether the reamer will be used for a hunting rifle or a target rifle.
The most popular target rifle match reamers, for instance, use interchangeable pilots graduated in ten-thousandths to fit an individual bore precisely while the hunting rifle reamer uses a one-size-fits-all solid pilot. Many serious hunters prefer a standard chamber even in a custom rifle so the rifle will chamber and fire less than perfect ammunition under field conditions.
The chamber is commonly cut after the barrel has already been profiled and threaded to fit the rifle receiver. This order allows the final adjustment of headspace to be made without changing the chambering setup in the lathe.
The barrel must be held in the lathe such that its bore is concentric with the center line of the lathe. To this end, the muzzle is often dialed in using a four-jaw chuck while the setup on the chamber end starts with the barrel in the tailstock center. The muzzle end of the barrel should be set up in a manner that keeps it from rotating in the chuck or being pushed further into the chuck by the reaming operation.
Using the reamer to cut a rifle chamber is not a difficult mechanical process but does require good technique and attention to detail. Good reamers, like good barrels and quality labor, are expensive. The accuracy benefits gained from the quality of the tools and parts are lost if the work is sloppy.
Plus 19 more gunsmith projects.
Drilling and Taping for Scope Mounts
Replacing an Integral Front Sight
Installing a Screw-in Choke Adapter
Installing a Pre-threaded Short Chambered Rifle Barrel
Metal checkering, like checkering on fine firearm stocks, is both useful and decorative in many applications. It is traditionally laid out and cut by hand with special checkering files. A different file is required for each line spacing, expressed in lines per inch of checkering. The pattern thus created is then finished up with fine triangular files.
The checkering can be made so sharp that it cuts the skin, or only sharp enough to afford a non-slip surface. It can be large or small depending on the number of lines per inch. The initial layout lines can be at 60° or 90° to each other, forming either diamonds or four-sided pyramids.
Checkering shares with knurling the function of providing a non-slip grip for the hand. Checkering differs from knurling in that it is usually a painstaking, labor intensive process of removing metal by skilled handwork.
Knurling is a machine process that relies on displacing metal using a machine tool such as a lathe. Checkering also differs from knurling in that it can be applied to many complex surface shapes other than cylindrical work. An example would be a pistol mainspring housing.
Cutting Steel with a Circular Saw Blade
Many of my wife's relatives live in picturesque northern Arkansas. Every year, we visit the relatives and travel the area. On our last visit, my brother-in-law, knowing of my interest in machine shop topics, shared with me a story of a local man who cuts steel with a circular saw blade meant for use in wood. This of course got my attention. After a phone call, we left for the gentleman's shop.
Once home, I duplicated the arbor and tried the process myself. The spindle speed was set at 210 rpm. I found that mild steel was cut cleanly, just as described. I cut a 1-1/2" diameter round steel bar quickly and smoothly. The chips were small and uniform and the blade did not appear to be hurt or worn by the process. The cut did tend to wander slightly on the thick stock, at least for me - possibly because of the thin blade or a too quick feed rate. A slightly smaller diameter or thicker blade may wander less.
Some chatter occurred when the work extended too far from the milling vise. Subsequent cuts in thinner work and various kinds of metals were straight and chatter-free. Like any large diameter cutter, it is potentially hazardous and requires utmost care in operation.
Making and Using a Bench Block
The home shop machinist delights in doing precision metalwork using a wide variety of lathes, mills, jigs, and fixtures to attain his ends. One thing common to most of these endeavors is the final assembly of the parts thus created. The assembly stage must fall somewhere between parts machining and project completion.
This work is usually done at the bench using hand tools and perhaps a machinist's vise. The use of bench blocks can both speed and ease much of this work as well as aid in any repair work that comes along.
Bench blocks can be almost anything the maker wants them to be. Two examples are shown in the drawings. Some versions are actually vises, including clamps or ingenious features for holding a specific item, and fall outside this definition.
Although the bench block may be held in a vise, the bench block itself is not a mechanical vise in that only hand pressure or gravity holds the work. For this reason, it should not be used to support work for machine operations. It is a quick and handy bench tool meant to be used for hand operations, and not a fixture.
The two broad categories of such bench blocks are the durable hardened and precision ground steel types and the softer cast iron, mild steel, brass, aluminum, nylon, and wooden types. The hardened steel block is the more specialized, usually a purchased item, and is not widely encountered in machine shops. The softer bench blocks are often shopmade and are widely used in many industries for various assembly/disassembly and deburring purposes.
Cleaning rust, corrosion, paint, welding flux, and a variety of other surface contaminants from various metals is a common chore for many hobbyists. The clean metal is then worked in various ways or finished according to need. Sandpaper, wire brushing, grinding, chemicals, and even heat are used to accomplish such cleaning.
A method of cleaning with a stream of air carrying a fine abrasive such as sand or glass beads is very versatile, gets into nooks and crannies, and does an excellent job. A special blast gun controls and directs the abrasive flow.
Shopping for a commercial unit met with early sticker shock. Commercially available cabinet-type units are, for my budget anyway, quite expensive. I decided to build a simple one that met my limited needs, and so, undertook a little research.
I found that, if you have access to an air compressor and some kind of vacuum cleaner, you can build an inexpensive cabinet abrasive blaster that can be used indoors, and will be adequate for a surprisingly large amount of work.
The precision machinist's inner man must occasionally leave the shop and feed the rest of him, preferably in the company of family and friends. In light of this, I set out to build a meat smoker to cook the main dish for these social breaks. Friends have often treated me to tender and juicy smoked brisket, ham, chicken, turkey, and even goat. Central to their culinary skills is some kind of meat smoker.
The smokers range from commercial units to homebuilts of every description. All have in common the ability to cook with low heat over a relatively long period of time using a wood fire to supply the heat and the smoke flavor. Two commonly used woods are hickory and mesquite.
My design combines several features the "pros" that attend competitive barbecue cook-offs use with material I was able to purchase from scrap dealers. The smoker uses steel plates to keep the flame from reaching the meat directly. The plates are heated by the fire and transmit the heat uniformly to the meat, aiding the desired slow cooking.
The placement of the baffles, grill surface, and smokestack combine to force the wood smoke all the way around the meat to add flavor. A pan of water can be placed under the meat on top of the plates if the "water smoked" style of cooking is preferred.
Upgrading to Variable Speed DC
Making a Hardened Steel Washer
Personal Safety and Machine Grounding
A Wooden Work Support in the Mill
Building a Hydraulic Press Twice
Any one of these projects is worth the small cost of the book! Excellent machining instruction, even if you never intend to make a gun part! Get it!
8-1/2 X 11" Hard cover 205 pages profusely illustrated with photos and drawings.
Visit my MarketplaceAdvisor Gallery! Power Tools for Power Sellers!
Phone: (***) 744-4449 M-F 9:00 to 4:00 Pacific Standard Time
This item has been seen by alt people!